Teaching elementary kids to write an opinion paragraph is sort of tricky and supporting an opinion takes time and practice. I started with my kids back in the fall to instill the structure. Although Thanksgiving is long gone, this writing project The Best Thing on the Thanksgiving Table: Opinion Writing was a great success. It was truly authentic writing and the kids were excited to get started- even my reluctant writers were jazzed to share. I easily met several standards and the skills were taught in context. These pieces got a lot of attention in the hall as well. We have a dedicated writing workshop chunk of time each day so it took us four days to from when I introduced the project to the final drafts hanging in the hall.
Step 1: Get Ideas Flowing. During Morning Meeting we shared a favorite Thanksgiving food and why we liked it so much. I always choose tomato gravy, a sweet, crimson-colored sauce from my childhood. Most kids have never heard of it so it gives me lots of possibilities to model my thinking throughout the project.
Step 2: Model First. how to choose a food and the topic sentence/concluding sentence on a graphic organizer. I modeled tomato gravy knowing no one else would 'take' it and shared the graphic organizer. You can get an opinion organizer HERE and and opinion writing rubric HERE for general projects, but a tailored version is also included in The Best Thing on the Thanksgiving Table. I like to have kids come up with their topic and concluding sentence right after they have selected the food. Introducing an opinion topic sentence needed a bit of work because key is to keep it general. As a group we generated possible topic and concluding sentences I could use on the board. Keep them up. They serve as student inspiration as well. Whenever working on topic/concluding sentences I ALWAYS use the hand-dandy whiteboard manipulatives included in this BUNDLE. Kids need a resource and they use this one! I put both out both sets for differentiation. Students then return to their seats to write their topic and concluding sentences. My heart sings when a child takes a word from the board, uses it at their seat, then returns it.
Step 3: Finish the Plan. The 'meat' of the writing are reasons supporting the opinion. First, we wrote a list of ideas on WHY a food could be a favorite. I'm sure we include how it tastes and what it looks like, but also take a step further tapping into family traditions or memories they have of the food. Look closely at the example to the left. This little friend, a reluctant writer, did an amazing job. Again, model your plan before letting kids complete their graphic organizer and differentiate as needed. Some may push themselves to write just two reasons while others 'dig deeper' and explaining their ideas more fully.
Step 4: Draft. I project my organizer then demonstrate how I used my plan to write an organized draft. We use plain lined notebook paper and skip lines. For this particular project I used the included Thanksgiving Word Bank to hold kids accountable for spelling. Depending on your grade level we read the list in unison before writing so everyone knows the words.
Step 5: Edit. Self edit. Peer edit. Teacher edit. 'Nuff said. We don't catch every single mistake prior to posting in the hall, however, the process is what is important.
Step 6. Final Draft. I like to have several versions of final draft paper for kids to choose from. Room for illustrations are a great touch.
Here are some other projects that get kids excited about writing!
Halloween Candy Opinion Writing
The Ultimate Birthday Party Description Writing
A Time I Got Hurt Personal Narrative
How to Make My Paper Snowflake
Book Recommendation
Showing posts with label Writing. Show all posts
March 22, 2017
6 Steps to Writing Great Opinion Paragraphs
October 18, 2016
6 Ways to Support Beginning Researchers
Just in time for Halloween, my students researched bats last week. This is our first research project of the year - there are more to come - and the kids loved doing it! Overall I'm pleased with our first formal research efforts and I'd love to pass along ideas I incorporated making the process smooth with built in success for beginning researchers.
1. Model every aspect of what you expect students to do. Don't assume they know! For this bat research I declared vampire bats off limits because I used it for my research example. When our Scholastic News packet came in a few weeks ago I was so pleased. They had an entire edition on vampire bats! I pulled some book resources and two days before assigning research groups I demonstrated how to collect vampire bat facts. I showed the kids how to safely Google for additional information and how to record their resources. At each stage it is critical to explain what you are looking for, and how to be organized. After students collected their information I modeled how to thoughtfully create a vampire bat brochure so they could see the quality and elements I look for.
2. Have beginning researchers work in groups. I posted a list of different bats and asked each child to write their top three choices. Using their requests (gotta have buy in!), their reading level and what I know about their personalities I was able to make groups of 2 or 3 students. It was a thoughtful process and I was sure the group combinations supported my low readers and pushed my high achievers as well. I ensured my IEP students collaborated with the special ed team and my identified Talented and Gifted worked with the most advanced resources.3. Collect resources prior to research. I wanted my students to use both print and online resources. This meant raiding our school and public library for bat books. I kept them all in one bin and did NOT allow students to put any of them in their Book Bins. It meant Googling different bats to see which ones had the most information at my students' reading levels. Based on the resources available and student needs I tailored the bat choice list.
4. Ask parents to come and help when kids are doing the research. I collaborate with my Technology Teacher when kids have done research before, however, I get as many adult helpers in the room as I can during the fact collection process. The adult helpers listen to my instructions then circulate, troubleshoot, assist and encourage all the groups. Whew! I would have a massive headache if it were just me in that room with all those hands up!
5. Expect kids create their own end product. Although students may be working from the same collection of facts as their research teammates, expect each kid to create their own end product. It was easy differentiate and see where some students need reteaching. 6. When finished, show kids the rubric. Discuss how the class, as a group, would score the vampire bat research model. After that allow kids to review and revise their own brochure to get the score desired. Allow kids to reflect on the process too. Beginning researchers may need a bit of coaching on this piece but it give you valuable insight.
Looking for other great research project for your class? Click on the links below. All are appropriate for both the seasoned and beginning researcher!
National Park Research Project
U.S. Landmark Research Project
Native American Tribe Research Project
Country Research Project
State Research Project
Explorer Research Project
Planet Research Project
Penguin Research Project
President Research Project
August 7, 2016
Setting Up a Classroom for Cultural Appreciation
Throughout the year I expose my students to a variety of world cultures. I try to give my little guys hands on experiences as much as possible so they'll grasp that there is a whole world waiting for them beyond our little town! What a joy when members of our school and community come to our room to take us on a little tour of their country. Most visitors share elements of their native foods, ideas and traditions. Could this passion project of mine make a global impact in the long run?
Here is how I set up my students to be open to new cultural ideas. First, I prime my kids to be curious. I tell them straight out that they could learn about some habits and beliefs that may seem unusual. My enthusiasm and sense of wonder is authentic and contagious. "Are you ready to learn some really cool things about _____?" Their heads bob up and down. Yes. Yes.
Second, my students are banned from saying "That's weird." Apparently in elementary school anything different is weird.... and I want to meet it head on. Certainly they are not allowed to say it when our guest is present, but it holds true for the follow up discussions as well. A mind is less open, curious and appreciative if something is labeled as weird.
Third, I give them an alternative phrase - "Wow! That's interesting. That's different."
"Today we are going to learn about _______. You'll find there are many things that are different from what you are used to. You may want to think, "That's weird!" but instead, in our classroom we think, "Wow! That's interesting. That's different." Please keep that in mind as we begin our lesson today. I hang this mini chart and point to it during the year. It's free in my store!
Finally, we reflect on the experience. Thinking about new ideas and making connections make concepts stick. We write a thank you letter to the presenter. I use this set. At the beginning of the school year the thank you is modeled and completed as a group. Toward the end there is usual a group that likes to take on the thank you responsibility then shares with the class.
Perhaps this will help you instill cultural appreciation as well.
On a side note: I had to chuckle toward the end of last school year. I wear glasses and one time I took them off. My students had never seen me without them on. "Wow. You look weird." one of my cuties said. Suddenly, another student jumped in. "No she doesn't! She looks different and interesting!" Gotta love that!
Here is how I set up my students to be open to new cultural ideas. First, I prime my kids to be curious. I tell them straight out that they could learn about some habits and beliefs that may seem unusual. My enthusiasm and sense of wonder is authentic and contagious. "Are you ready to learn some really cool things about _____?" Their heads bob up and down. Yes. Yes.
Second, my students are banned from saying "That's weird." Apparently in elementary school anything different is weird.... and I want to meet it head on. Certainly they are not allowed to say it when our guest is present, but it holds true for the follow up discussions as well. A mind is less open, curious and appreciative if something is labeled as weird.
Third, I give them an alternative phrase - "Wow! That's interesting. That's different."
"Today we are going to learn about _______. You'll find there are many things that are different from what you are used to. You may want to think, "That's weird!" but instead, in our classroom we think, "Wow! That's interesting. That's different." Please keep that in mind as we begin our lesson today. I hang this mini chart and point to it during the year. It's free in my store!
Finally, we reflect on the experience. Thinking about new ideas and making connections make concepts stick. We write a thank you letter to the presenter. I use this set. At the beginning of the school year the thank you is modeled and completed as a group. Toward the end there is usual a group that likes to take on the thank you responsibility then shares with the class.
Perhaps this will help you instill cultural appreciation as well.
On a side note: I had to chuckle toward the end of last school year. I wear glasses and one time I took them off. My students had never seen me without them on. "Wow. You look weird." one of my cuties said. Suddenly, another student jumped in. "No she doesn't! She looks different and interesting!" Gotta love that!
Labels:
Anchor Chart,
Freebie,
Organization,
World Cultures,
Writing
July 31, 2016
Making Grammar Lessons Stick
My school is firmly tied to a basal series and I am expected to use just about every piece of that curriculum. Yet I run my literacy block as a Reader's Workshop/D5 model! How does that work? Sometimes it isn't easy, yet I'm very grateful to have flexibility on how I put the pieces together. Also, I have freedom to supplement as I see fit, and I supplement a lot - especially when it comes to teaching grammar and mechanics.
Oh how dry and boring are isolated worksheets. Here is a way to teach grammar and mechanics so it is applicable, meaningful and 'normal'. Teach it in context.
I look a week ahead in the basal scope and sequence. The week prior to it being taught in the basal, I introduce that concept via my daily Morning Message. I blogged about how I integrate content in my Morning Message here. For example, if I know that writing book titles is coming up, I'm sure to cover it in my Morning Message this week. I think of it like dripping information on my students. It gives kids exposure and practice for two weeks instead of one.
I share and explain a correct model. Keep it simple. "Look here. I underlined Little House on the Prairie? This is because we always underline the title of a book. It lets the reader know it is a title."
Later in the week I'll make a mistake.
"We have a problem here. Can anyone spot it?"
"Yes. I must underline When I Was Young in the Mountains. Who can explain why?"
A student will find, correct and explain the error in my message.
In addition, we discuss the concept as it relates to our daily mini lesson and read alouds.
"If I were to write a letter to my mom recommending this book, how would I write the title of this book?"
During the second week (the week it is targeted in the scope and sequence) I project a few worksheets from the basal during a writing mini lesson. We do it whole group so kids will become familiar seeing the concept presented different ways. In addition, I want them to know the format for assessment day.
Throughout the week however, I use these activity sheets.
I love these because they can be used with ANY text at ANY level and, most importantly, they focus on noticing and understanding the skills in context.
The top left is a skill anchor chart. It reminds students of the overall skill concept in bold. There are one or two examples to practice the skill.
The top right is a task card. This gives students instructions.
The bottom is an area for student interaction using their own text. A quick check lets me see who has mastered the skill and who needs reteaching.
These Grammar and Mechanic Sheets are very flexible! There is built in differentiation and are super for informal assessments.
1. Model a new sheet during a mini lesson after the skill has been introduced and taught. Work as a whole group.
2. Explain the three key pieces of the sheet whole group. Depending on student need, students work independently, with a partner or with direct instruction in a small group setting.
3. Use with the basal anthology or the basal readers or self-selected text.
4. Complete during guided reading, Word Work or Writer's Workshop.
5. Students project their 'findings' and share with the class.
6. Keep as a whole sheet or cut and glue into a Reader's Notebook.
If you'd like to try out a sample for free click here
Teaching grammar and mechanic skills in context helps concepts stick better with kids. How do you authentically engage students when tied to a basal series?
Oh how dry and boring are isolated worksheets. Here is a way to teach grammar and mechanics so it is applicable, meaningful and 'normal'. Teach it in context.
I look a week ahead in the basal scope and sequence. The week prior to it being taught in the basal, I introduce that concept via my daily Morning Message. I blogged about how I integrate content in my Morning Message here. For example, if I know that writing book titles is coming up, I'm sure to cover it in my Morning Message this week. I think of it like dripping information on my students. It gives kids exposure and practice for two weeks instead of one.
I share and explain a correct model. Keep it simple. "Look here. I underlined Little House on the Prairie? This is because we always underline the title of a book. It lets the reader know it is a title."
Later in the week I'll make a mistake.
"We have a problem here. Can anyone spot it?"
"Yes. I must underline When I Was Young in the Mountains. Who can explain why?"
A student will find, correct and explain the error in my message.
In addition, we discuss the concept as it relates to our daily mini lesson and read alouds.
"If I were to write a letter to my mom recommending this book, how would I write the title of this book?"
During the second week (the week it is targeted in the scope and sequence) I project a few worksheets from the basal during a writing mini lesson. We do it whole group so kids will become familiar seeing the concept presented different ways. In addition, I want them to know the format for assessment day.
Throughout the week however, I use these activity sheets.
I love these because they can be used with ANY text at ANY level and, most importantly, they focus on noticing and understanding the skills in context.
The top left is a skill anchor chart. It reminds students of the overall skill concept in bold. There are one or two examples to practice the skill.
The top right is a task card. This gives students instructions.
The bottom is an area for student interaction using their own text. A quick check lets me see who has mastered the skill and who needs reteaching.
These Grammar and Mechanic Sheets are very flexible! There is built in differentiation and are super for informal assessments.
1. Model a new sheet during a mini lesson after the skill has been introduced and taught. Work as a whole group.
2. Explain the three key pieces of the sheet whole group. Depending on student need, students work independently, with a partner or with direct instruction in a small group setting.
3. Use with the basal anthology or the basal readers or self-selected text.
4. Complete during guided reading, Word Work or Writer's Workshop.
5. Students project their 'findings' and share with the class.
6. Keep as a whole sheet or cut and glue into a Reader's Notebook.
If you'd like to try out a sample for free click here
Teaching grammar and mechanic skills in context helps concepts stick better with kids. How do you authentically engage students when tied to a basal series?
July 1, 2016
Make the Final Draft FUN - Illuminated Letters
Our final writing project last year was an original fairy tale. Inspired by this Fractured Fairy Tales unit, my students ended our time together with some really fun and creative pieces. Engaged from beginning to end, it allowed for differentiation and flexibility. Even my most reluctant writers were gung ho. We started by watching several Fractured Fairy Tale videos from the 70's and then we picked apart some mentor texts. This process got me buy in and served as an inspiration springboard. Check out the link to my Fractured Fairy Tale Resource Pinterest board below.
I wanted to make the final draft unusual so, inspired by our art teacher's suggestion, I whipped out my lettering sets. These have come in handy so many times over the years! The art teacher had been sharing illuminated manuscripts to go along with our study of the Renaissance in social studies. The kids knew illuminated letters were typically done in gold or silver and they came up with the gold glitter addition. Look at these end results! How fantastic!
Incorporating illuminated letters in the final draft did take some planning. First, kids had to leave enough room on the paper to add in the letter. After that final edit they were ready. Using the lettering sets, kids worked in pencil to create a fun and funky letter with an illustration surrounding it. Next, they went over the illustration in color. These examples are done in marker, perhaps not the best tool because many didn't get the crisp lines they wanted, but it worked. We all agreed that next time it should be done in colored pencil. After the marker, kids used a fine line of glue to trace the letter. Sprinkling the glitter and letting it dry was the final step.
Illuminated letters could be incorporated into many writing projects. You can pick up the lettering sets here. You can follow my Pinterest fractured fairy tale board here.
I wanted to make the final draft unusual so, inspired by our art teacher's suggestion, I whipped out my lettering sets. These have come in handy so many times over the years! The art teacher had been sharing illuminated manuscripts to go along with our study of the Renaissance in social studies. The kids knew illuminated letters were typically done in gold or silver and they came up with the gold glitter addition. Look at these end results! How fantastic!
Incorporating illuminated letters in the final draft did take some planning. First, kids had to leave enough room on the paper to add in the letter. After that final edit they were ready. Using the lettering sets, kids worked in pencil to create a fun and funky letter with an illustration surrounding it. Next, they went over the illustration in color. These examples are done in marker, perhaps not the best tool because many didn't get the crisp lines they wanted, but it worked. We all agreed that next time it should be done in colored pencil. After the marker, kids used a fine line of glue to trace the letter. Sprinkling the glitter and letting it dry was the final step.
Illuminated letters could be incorporated into many writing projects. You can pick up the lettering sets here. You can follow my Pinterest fractured fairy tale board here.
February 2, 2016
Writing a First Draft - 6 Helpful Tips
I love to teach writing to kids. Indeed I do! I realize I'm in the minority so want to pass along 6 helpful hints that will hopefully get you inspired as well.
Tip #1: Require that students ALWAYS write from a plan - Graphic organizers are key to producing organized and focused pieces. It sets the stage, gives kids a plan and makes a longer writing piece manageable. On the left an older student has planned out the answer to a writing prompt. I blogged about the importance of planning on a personal narrative piece HERE. On the right a younger student has used a graphic organizer to begin writing a non-fiction piece about penguins.
Tip #2: Share a model before allowing kids to write - they will produce better quality work when they see what you have done, listened to you think out loud about your writing and observed you make the transition from graphic organizer to writing draft. This does not have to take long. I write as authentically as possible. When modeling a personal narrative I choose a story that happened to me when I was roughly the same age as my students. When modeling animal research I choose a critter that interests me. When modeling a how to piece I choose something I've done which I believe my students can relate to. Unless you change grade levels you can use the model year after year.
T #3: Break the writing into chunks - I promise you'll be happy you've done this. A graphic organizer lends itself to natural breaks and makes the process easy. We recently wrote a short story. One day we drafted the beginning. The next day we drafted the middle. The last day we drafted the end. Yes. This approach takes a couple more days of instruction, but the benefits are worth it. Kids work with manageable chunks and don't get bored. You can circulate and support much more effectively. It's easy to do a quick check in, pull a few kids with similar errors and teach a targeted mini lesson before they get too far. On the flip side, I often will project student work to the class (with permission) highlighting something well done along the way.
Tip #4: We use regular 3-hole notebook paper for our drafts. Nothing fancy. The first thing my students do is put their name at the top then put an x on every other line. This reminds them to skip lines so editing is really easy. Sometimes, especially at the beginning of the year, a kid realizes s/he has forgotten to skip lines (despite the x in
the margin....) tell them not to panic or erase - just begin skipping
lines right NOW and continue.
Tip #5: Students need some sort of spelling resource (that they have been trained to use!) and must have it out. I have a mini economy going and when it is writing time I walk around and pass out 'money' to those who have out their spelling card. No words. No conversation...and you'd be amazed how quickly those cards come flying out! If you need something really handy check out the one my class uses. It's ideal for grades 2 and up and has made a huge difference in student accountability.
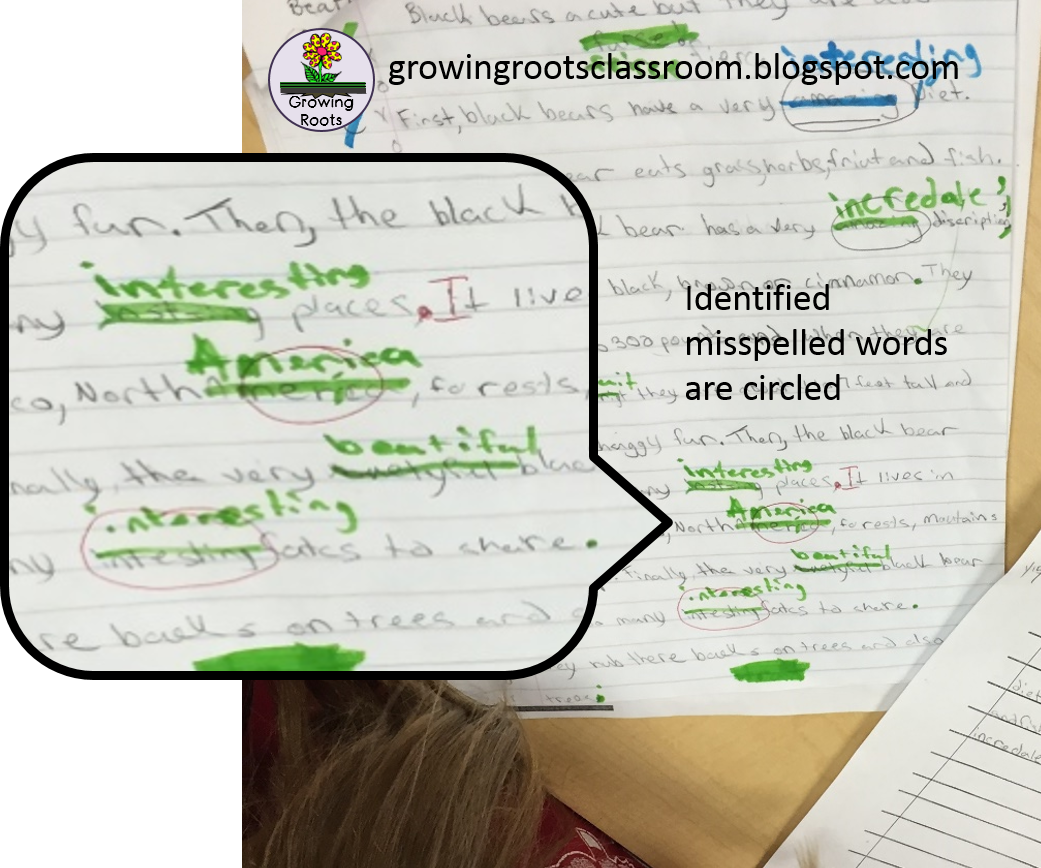
Subject-specific Word Banks are helpful too. They do take some time to create but not only do they serve as a great resource, but as inspiration as well. Either project the word bank or make a copy for each kid. During the draft stage some kids will want to use a word that is not on any of their resources. In that case I instruct them to write the word as well as they can - then circle it. This allows them to move on.
Tip #6: I have an electric stapler. I can't live without my electric stapler because kids have to staple their draft to the back of their plan. Guess what -no more loose papers AND kids love to staple things so they do the job. So simple yet so genius. No more, "I can't find my writing." Here is the staple mess at the end of our animal report project, but isn't a problem. An electric stapler does a tidy job. If you don't have an electric stapler, don't worry. A regular will work too - but you may want to invest in an electric one.
Leave a comment if you found any of these tips helpful and I'd love to hear your tricks too! Happy drafting!
Tip #1: Require that students ALWAYS write from a plan - Graphic organizers are key to producing organized and focused pieces. It sets the stage, gives kids a plan and makes a longer writing piece manageable. On the left an older student has planned out the answer to a writing prompt. I blogged about the importance of planning on a personal narrative piece HERE. On the right a younger student has used a graphic organizer to begin writing a non-fiction piece about penguins.
Tip #2: Share a model before allowing kids to write - they will produce better quality work when they see what you have done, listened to you think out loud about your writing and observed you make the transition from graphic organizer to writing draft. This does not have to take long. I write as authentically as possible. When modeling a personal narrative I choose a story that happened to me when I was roughly the same age as my students. When modeling animal research I choose a critter that interests me. When modeling a how to piece I choose something I've done which I believe my students can relate to. Unless you change grade levels you can use the model year after year.
T #3: Break the writing into chunks - I promise you'll be happy you've done this. A graphic organizer lends itself to natural breaks and makes the process easy. We recently wrote a short story. One day we drafted the beginning. The next day we drafted the middle. The last day we drafted the end. Yes. This approach takes a couple more days of instruction, but the benefits are worth it. Kids work with manageable chunks and don't get bored. You can circulate and support much more effectively. It's easy to do a quick check in, pull a few kids with similar errors and teach a targeted mini lesson before they get too far. On the flip side, I often will project student work to the class (with permission) highlighting something well done along the way.
Tip #4: We use regular 3-hole notebook paper for our drafts. Nothing fancy. The first thing my students do is put their name at the top then put an x on every other line. This reminds them to skip lines so editing is really easy. Sometimes, especially at the beginning of the year, a kid realizes s/he has forgotten to skip lines (despite the x in
the margin....) tell them not to panic or erase - just begin skipping
lines right NOW and continue.Tip #5: Students need some sort of spelling resource (that they have been trained to use!) and must have it out. I have a mini economy going and when it is writing time I walk around and pass out 'money' to those who have out their spelling card. No words. No conversation...and you'd be amazed how quickly those cards come flying out! If you need something really handy check out the one my class uses. It's ideal for grades 2 and up and has made a huge difference in student accountability.
Subject-specific Word Banks are helpful too. They do take some time to create but not only do they serve as a great resource, but as inspiration as well. Either project the word bank or make a copy for each kid. During the draft stage some kids will want to use a word that is not on any of their resources. In that case I instruct them to write the word as well as they can - then circle it. This allows them to move on.
Tip #6: I have an electric stapler. I can't live without my electric stapler because kids have to staple their draft to the back of their plan. Guess what -no more loose papers AND kids love to staple things so they do the job. So simple yet so genius. No more, "I can't find my writing." Here is the staple mess at the end of our animal report project, but isn't a problem. An electric stapler does a tidy job. If you don't have an electric stapler, don't worry. A regular will work too - but you may want to invest in an electric one.Leave a comment if you found any of these tips helpful and I'd love to hear your tricks too! Happy drafting!
December 6, 2015
Planning a Personal Narrative - YOU need a plan!
Before beginning ANY piece of writing there has to be a plan. YOU need to plan. YOU need to be prepared! When teaching writing YOU must model everything you expect your students to do.
For this project, remember a time YOU got hurt? If you have some scars to share even better! Tell them the basic story to generate enthusiasm. The next day remember some more details about the story. (Don't have a story? Make one up!)
Ask your students about a story they have. Tell the story to a classmate. Assign it as homework to talk to their parents to gather more details about their horrible trauma. The goal is getting your writers to commit and get enthusiastic about their story.
YOU fill out the OUCH! planning graphic organizer and share it with your kids. Model writing in note form and talk about how/why you did it. Modeling how to plan the story you've shared is key. Pass out an OUCH! graphic organizer to each kid.
Give students about 10 minutes to plan their story and that's it. Quick notes and a quick sketch.
Now stop. Do not go on. Supporting students to craft quality writing is a step by step process. Trust me, some students will begin writing the entire story on their planning sheet - but you don't want that! Walk and redirect as needed. It is helpful to have another adult during this stage to help. To achieve the desired end result, planning is critical and YOUR plan will set the stage.
February 7, 2015
Authentic Writing Experiences: Student-Created Birthday Book
Writing is a craft and a life skill. Aren't we lucky to teach young writers "tools" to creatively bridge the gap between what develops in the mind to what ends up on the paper? I hope you've witnessed a child who struggled with writing and then turned the corner.
As kids work on paragraph writing, providing authentic reasons to write become a big motivator. In my opinion, an authentic writing experience is writing for someone other than me. I must be someone the child cares about - and cares about them - who will enthusiastically read what they've written. That is a 'real' purpose and puts your efforts into context.
This Birthday Book is a simple way to incorporate authentic writing.
At the beginning of the year I mark each child's birthday in my planner. Summer birthdays are celebrated as a half birthday. I make unbound copies of a book for each child - cover and blank letter templates for the number of kids in the class - and paper clip those together. On the Word Bank I plug in my current class' names and copy on bright card stock. This allows me to pull a birthday book and easily find a word bank as indicated in my planner.
When it's someone's birthday I make my Work on Writing rotation "Write a nice birthday letter to ________". Each child gets a letter template and goes to town writing a letter to their classmate. I expect my students to incorporate compliments, specific things they respect or admire about the child and a wish for them. Along the way I expect kids to use the Birthday Word Bank as a spelling resource and proofread for spelling, mechanics and structure.They will quickly (or slowly) internalize parts of a letter.
At the beginning there is lots of coaching and instruction. Over the year, confidence grows and the process helps with writing fluency and word choice. An illustration box and caption is a non-fiction text feature allowing the birthday child to get lots of 'gifts'. The two examples below are middle of the year second grade Birthday Book letters.
Second grade work
As Editor-in-Chief I scan letters before binding 1. to be sure they are all appropriate and 2. to hand back letters for improvements when needed.
I'll admit some years there is a lil' stinker in the class. Hopefully you'll know in advance when classmates will be at a loss for compliments. To be proactive, those occasions are great opportunities for a mini lesson on word choice before the birthday letters. Together we brainstorm things the lil' stinker is good at - then discuss words to describe them. This way you have compliments written on the board ready to go and your writers have an easier time.
What does the birthday child do during Work on Writing? They design the book cover and do a birthday word find.
What started out as an experiment during my early teaching years turned into a huge success. Kids love reading their classmates' letters. Parents tell me their child's Birthday Book is going in the Memory Box. The Birthday Book is an authentic writing experience builds classroom community and motivates kids to improve their writing skills.
As kids work on paragraph writing, providing authentic reasons to write become a big motivator. In my opinion, an authentic writing experience is writing for someone other than me. I must be someone the child cares about - and cares about them - who will enthusiastically read what they've written. That is a 'real' purpose and puts your efforts into context.
This Birthday Book is a simple way to incorporate authentic writing.
At the beginning of the year I mark each child's birthday in my planner. Summer birthdays are celebrated as a half birthday. I make unbound copies of a book for each child - cover and blank letter templates for the number of kids in the class - and paper clip those together. On the Word Bank I plug in my current class' names and copy on bright card stock. This allows me to pull a birthday book and easily find a word bank as indicated in my planner.
When it's someone's birthday I make my Work on Writing rotation "Write a nice birthday letter to ________". Each child gets a letter template and goes to town writing a letter to their classmate. I expect my students to incorporate compliments, specific things they respect or admire about the child and a wish for them. Along the way I expect kids to use the Birthday Word Bank as a spelling resource and proofread for spelling, mechanics and structure.They will quickly (or slowly) internalize parts of a letter.
At the beginning there is lots of coaching and instruction. Over the year, confidence grows and the process helps with writing fluency and word choice. An illustration box and caption is a non-fiction text feature allowing the birthday child to get lots of 'gifts'. The two examples below are middle of the year second grade Birthday Book letters.
Second grade work
As Editor-in-Chief I scan letters before binding 1. to be sure they are all appropriate and 2. to hand back letters for improvements when needed.
I'll admit some years there is a lil' stinker in the class. Hopefully you'll know in advance when classmates will be at a loss for compliments. To be proactive, those occasions are great opportunities for a mini lesson on word choice before the birthday letters. Together we brainstorm things the lil' stinker is good at - then discuss words to describe them. This way you have compliments written on the board ready to go and your writers have an easier time.
What does the birthday child do during Work on Writing? They design the book cover and do a birthday word find.
What started out as an experiment during my early teaching years turned into a huge success. Kids love reading their classmates' letters. Parents tell me their child's Birthday Book is going in the Memory Box. The Birthday Book is an authentic writing experience builds classroom community and motivates kids to improve their writing skills.
January 31, 2015
Building Independent Spellers with a Spelling Word Card
Having access to a kid-friendly spelling resource is key for elementary writers. For a long time I purchased a small spelling booklet for each student. I taught how to use it and modeled frequently. But here's the thing - kids rarely used it independently! Flipping through a booklet to find the correct spelling took more time than most kids were willing to invest.
During my Master's program I tackled this problem and created the Spelling Word Card - a simple, one page, kid-friendly spelling resource for middle and upper elementary kids. Over a four month period, I collected words students frequently asked how to spell. I combined those with their common spelling errors. I also picked words from the Dolch list my students had not yet mastered.
I've been teaching a while and have found it is the most efficient way to build independent spellers. The cards quickly become a well-used resource. Bent edges. Small rips. Lots of 'personality'. Love it!
Each child has his/her own card stock copy. There is a spot for a name so kids add words throughout the year. It becomes a personal word wall.
The following ideas help kids use them independently.
1. Introduce the card then play lots of games. Kids need to know the words included.
2. Expect students to have it out for any writing assignment in any content area. If you have a classroom economy, silently pass out 'cash' to anyone with the Spelling Word Card on their desk.
3. When a child asks how to spell a word ask "Did you look on your Spelling Word Card?" Most return to their desk and use it.
4. Some lil' stinkers will say "yes" - even when they didn't. But, you'll get a sense pretty quickly of the words included. Just smile and say, "Bring me your card and show me where should that word should be." Usually they don't come back.
5. If a word is not on the card I write on the white board and have them copy it onto the card. The helps create ownership.
6. Tell parents about the card and send a copy home.
Click the Spelling Word Card to get your own copy. Happy teaching!
During my Master's program I tackled this problem and created the Spelling Word Card - a simple, one page, kid-friendly spelling resource for middle and upper elementary kids. Over a four month period, I collected words students frequently asked how to spell. I combined those with their common spelling errors. I also picked words from the Dolch list my students had not yet mastered.
I've been teaching a while and have found it is the most efficient way to build independent spellers. The cards quickly become a well-used resource. Bent edges. Small rips. Lots of 'personality'. Love it!
Each child has his/her own card stock copy. There is a spot for a name so kids add words throughout the year. It becomes a personal word wall.
The following ideas help kids use them independently.
1. Introduce the card then play lots of games. Kids need to know the words included.
2. Expect students to have it out for any writing assignment in any content area. If you have a classroom economy, silently pass out 'cash' to anyone with the Spelling Word Card on their desk.
3. When a child asks how to spell a word ask "Did you look on your Spelling Word Card?" Most return to their desk and use it.
4. Some lil' stinkers will say "yes" - even when they didn't. But, you'll get a sense pretty quickly of the words included. Just smile and say, "Bring me your card and show me where should that word should be." Usually they don't come back.
5. If a word is not on the card I write on the white board and have them copy it onto the card. The helps create ownership.
6. Tell parents about the card and send a copy home.
Click the Spelling Word Card to get your own copy. Happy teaching!
Labels:
Organization,
Spelling,
Writing
Subscribe to:
Posts (Atom)